I've spent this weekend pretty dedicated to my Big Cabled Bag. I've gotten the total up to 8.5 inches completed, so only four inches of cables left, followed by about an inch of ribbing...then I've at least got the body of the bag finished. Then I have the braided I-cord straps and the bottom panel, and then the lining needs to be sewn. I'm still on the fence about adding the side pockets. I probably will, so then that will be two more panels to knit and then seam on.
Today I feel very cooped up, so I think the child and I will go for a walk this evening when it cools down. I figure a walk will at least get us out of this apartment for a while.
I think I'm going to take a break from the Bag and make a couple of puffs this afternoon/evening. Maybe that will make me feel like I've really been productive even though I haven't left my house in four days. lol
Sunday, August 28, 2011
Friday, August 26, 2011
Puffs, Purses and Pox...
Well my original claim to post something knitting related every day... well that didnt' so much work out how I planned.
Lately life has gotten in the way.
I've managed to knit another puff...that brings my total to 2. *sigh* I planned to make at least one a day. Maybe next week I will?
I've added a couple more rows to my big cabled purse...but I really had hoped to have it finished and ready for the lining process by now. Oh well.
My 5 year old has the chicken pox. So far she doesn't seem to have it badly, so its just spots and a lowgrade fever at this point. I'm so glad she isn't itchy. I've heard so many horror stories about the scars that can come from the Pox.
Since I will be home for the next few days, I plan to make much more progress on all projects... so stay tuned for tomorrows progress post!
Thursday, August 18, 2011
Resistance is Futile. You WILL KNIT THE PUFFS.
So the newest craze to sweep the knitting community... Hexapuffs.
Thanks to Tiny Owl Knits the whole world is knitting the puffs.
Allow me to explain.
These are cute little hexagon shaped stuffed puffs that once hooked together will form the BeeKeepers Quilt. Or, in my case, the wall o'puffs.
I'm not really the kind to decorate with paintings or flowers or whatever other knick knacks and such that most sane 29 year olds would decorate with. I decorate with yarn. I call it Yarn Bomb Home decor. I've been inspired to create a wall of puffs instead of the quilt.
So far I have one and a half puffs done. So basically I only have 498.5 puffs left. lol
 Here is Puff numero Uno with the two bags of future puffs in the background.
Thanks to Tiny Owl Knits the whole world is knitting the puffs.
Allow me to explain.
These are cute little hexagon shaped stuffed puffs that once hooked together will form the BeeKeepers Quilt. Or, in my case, the wall o'puffs.
I'm not really the kind to decorate with paintings or flowers or whatever other knick knacks and such that most sane 29 year olds would decorate with. I decorate with yarn. I call it Yarn Bomb Home decor. I've been inspired to create a wall of puffs instead of the quilt.
So far I have one and a half puffs done. So basically I only have 498.5 puffs left. lol
Monday, August 15, 2011
The Balancing Act...
I constantly struggle with balancing all of the things that I have going on in my life. I'm a single parent, I work, I have a house to take care of, and a business to help my sister get off the ground.
Where do I find the time to knit? I'm trying to make knitting profitable as well, so should I put knitting higher up on the priority list? I struggle with feeling guilty when I do put down everything else and pick up my needles. I know that there are ten other things that I COULD be doing instead, but knitting is one of the few things I have in my life that I truly enjoy doing... so is it so wrong to dedicate time every day to it?
I see all of these fantastic knitters on Ravelry and around the blog world and I wonder where they find the time? How did they become so amazing and design all of these awesome patterns AND have families and jobs and lives?
I would love some actual responses to this. Where do you find the time to knit? Do you feel guilty when you take time away from other things for your crafting? Are your spouses/SO's/families supportive of your knitting/crocheting?
Saturday, August 13, 2011
Big Cabled Bag...in progress.
After hours and hours of searching Ravelry and the internet for a pattern for a knit purse that would fit my laptop in it, I only found one that might work, and after four failed attempts at the pattern... I decided I should just make my own dang pattern.
So I'm only about three inches into it so far...but it's going well. I don't have a picture to post yet but I will as soon as I've made a bit more progress.
It's basically just a cabled pattern on the front and back with ribbed gussets. I'll sew in an accordion style liner and a couple pockets...and it will be EPICLY AWESOME.
Stay tuned...when the pattern is finished...you'll be the first to know.
Friday, August 12, 2011
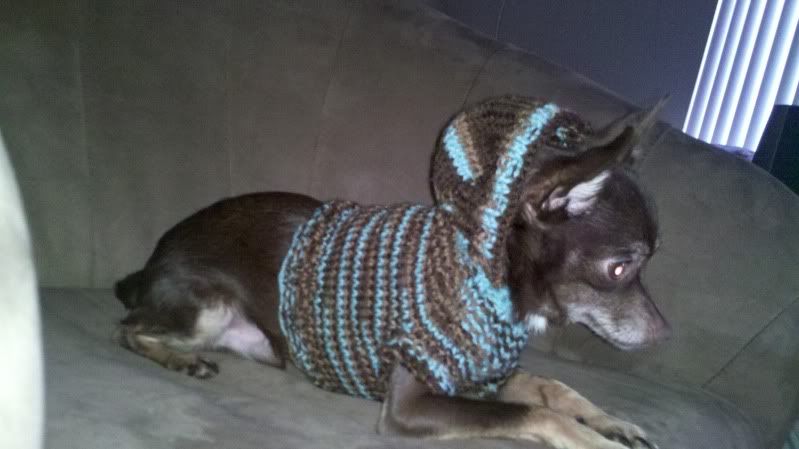
Chihuahua Hoodie
Keep in mind that these are more like general instructions, not a row by row pattern.
Measure your dog (or cat) around the stomach, from groin area (you don't want the sweater to cover that area or you will have a messy puppy/kitty) to front legs, between front legs, around neck and length of neck.

CO 48 (or # of stitches needed for your size in an even number)
k2p2 rib ( in the round) for about 1-1.5 inches keeping a marker at the beginning of the round.
Knit (in the round) for about 5 inches (or number of inches from groin to front legs).
Using the beginning of round marker as the center, place two markers on either side of the center to mark how far apart the front leg holes should be. (For my dog his legs are two inches apart, so I placed a marker an inch from center on each side).
Knit to first marker, and then as you knit the next 10 (or 15 for larger dogs) place the stitches on stitch holder or scrap yarn. Continue knitting around to 1o (or 15) stitches before second marker and repeat. Remove the two extra markers. (Leave the beginning of round marker).
Continue knitting around for about 1.5 inches.
k2p2 rib for 1-1.5 inches
Using beginning of round marker as center, count out a third of the stitches on each side of the center and place a marker.
The "top" third of the stitches will be your hood.
K2P2 to first marker.
Knit across the hood stitches placing a marker in the center, turn work and purl back. Turn and knit, turn and purl back. Move marker up each row.
On the next row Knit first stitch and then kfb in the second stitch. knit across to stitch before center, kfb increase, knit center stitch, and then kfb. Knit across to next to last stitch, kfb, knit last stitch.
Repeat increase row every right side row for about two inches.
Skip 2nd and next to last increases and continue center increases until hood is half as tall as necessary.
Knit knits and purl purls until hood is at the right height.
pick up stitches along sides of hood and k2p2 around hood and neck until neck is long enough. Bind off stitches around neck, and continue k2p2 rib around hood stitches until hood is as deep as necessary. Bind off.
I sewed bottom edges of the hood rib to the neck area to give it a good shape when folded back, but you could add a drawstring around instead by weaving a cord through the ribs.
***This "pattern" is untested so please let me know if I didn't write it clearly enough, or if you find a mistake!***
Side Button Dog Sweater
I decided to add another dog sweater to my repertoire.
It's such a pain in the butt to get a pullover sweater on my twitchy jumpy little chihuahua... I figured a side button sweater would be ideal. It's not too terribly cold in AZ in the winter so I also figured a "medium coverage" sweater would be good too.
Soooo... drumroll please......
Here it is. My Side Button Dog Sweater.

*I haven't tested this pattern for the larger sizes yet, so please let me know if you find errors!*
This pattern was written for my 4lb chihuahua (medium sized small dog, medium large small dog).
CO 25 (35/45)
*k1,p1* rib for 1 (2,2) inches
RS- k1,p1, k across to last two stitches, p1,k1
WS- p1,k1, p across to last two stiches, k1,p1
Repeat for 2 (3,4) inches
RS- k1,p1, k across to last two stitches, p1,k1, cast on 35 (45,55) stitches at end of row for side panel..
WS- p1,k1 across side panel stitches and p across body stitches to last two stitches, k1,p1.
RS- k1,p1, k across body to last two stitches, p1, k1, *k1, p1* rib across side panel.
WS- *p1,k1* rib across side panel stitches, p1,k1, p across body stitches to last two stitches, k1,p1.
RS- k1,p1, k across (body and side panel) to last four stitches. Bind off 2 stitches (or use preferred buttonhole method), p1, k1
WS- p1,k1, cast on 2 stitches, p across to last two stitches, k1,p1.
RS- k1,p1, k across, p1,k1
WS- p1,k1, p across, k1, p1
repeat for 2.5/3.5/4.5 inches.
RS- k1,p1, k across (body and side panel) to last four stitches. Bind off 2 stitches (or use preferred buttonhole method), p1, k1
WS- p1,k1, cast on 2 stitches, p across to last two stitches, k1,p1.
RS - k1, p1, k across body, *p1, k1* across side panel
WS- *p1, k1* across side panel, k across body until last 2 stitches, k1, p1
RS - k1, p1, k across body, *p1, k1* across side panel
WS- bind off side panel (follow rib pattern with bind off), p1, k1, p across body to last 2 stitches, k1, p1
RS- k1,p1, k across to last 2 stitches, p1,k1
WS- p1,k1, p across to last 2 stitches, k1, p1
RS- *k1 p1* across, cast on 15, 25, 35
WS- *p1, k1* across
Continue with *k1 p1* rib for 1 (2, 2) inches
RS- k1, p1 across to last four stitches, bind off 2, k1, p1
WS- P1, k1, cast on 2, *p1, k1* across
Continue for 2 (2, 4) inches and bind off.
Sew buttons on right side edge to match with button holes
The end!
It's such a pain in the butt to get a pullover sweater on my twitchy jumpy little chihuahua... I figured a side button sweater would be ideal. It's not too terribly cold in AZ in the winter so I also figured a "medium coverage" sweater would be good too.
Soooo... drumroll please......
Here it is. My Side Button Dog Sweater.

This pattern was written for my 4lb chihuahua (medium sized small dog, medium large small dog).
CO 25 (35/45)
*k1,p1* rib for 1 (2,2) inches
RS- k1,p1, k across to last two stitches, p1,k1
WS- p1,k1, p across to last two stiches, k1,p1
Repeat for 2 (3,4) inches
RS- k1,p1, k across to last two stitches, p1,k1, cast on 35 (45,55) stitches at end of row for side panel..
WS- p1,k1 across side panel stitches and p across body stitches to last two stitches, k1,p1.
RS- k1,p1, k across body to last two stitches, p1, k1, *k1, p1* rib across side panel.
WS- *p1,k1* rib across side panel stitches, p1,k1, p across body stitches to last two stitches, k1,p1.
RS- k1,p1, k across (body and side panel) to last four stitches. Bind off 2 stitches (or use preferred buttonhole method), p1, k1
WS- p1,k1, cast on 2 stitches, p across to last two stitches, k1,p1.
RS- k1,p1, k across, p1,k1
WS- p1,k1, p across, k1, p1
repeat for 2.5/3.5/4.5 inches.
RS- k1,p1, k across (body and side panel) to last four stitches. Bind off 2 stitches (or use preferred buttonhole method), p1, k1
WS- p1,k1, cast on 2 stitches, p across to last two stitches, k1,p1.
RS - k1, p1, k across body, *p1, k1* across side panel
WS- *p1, k1* across side panel, k across body until last 2 stitches, k1, p1
RS - k1, p1, k across body, *p1, k1* across side panel
WS- bind off side panel (follow rib pattern with bind off), p1, k1, p across body to last 2 stitches, k1, p1
RS- k1,p1, k across to last 2 stitches, p1,k1
WS- p1,k1, p across to last 2 stitches, k1, p1
RS- *k1 p1* across, cast on 15, 25, 35
WS- *p1, k1* across
Continue with *k1 p1* rib for 1 (2, 2) inches
RS- k1, p1 across to last four stitches, bind off 2, k1, p1
WS- P1, k1, cast on 2, *p1, k1* across
Continue for 2 (2, 4) inches and bind off.
Sew buttons on right side edge to match with button holes
The end!
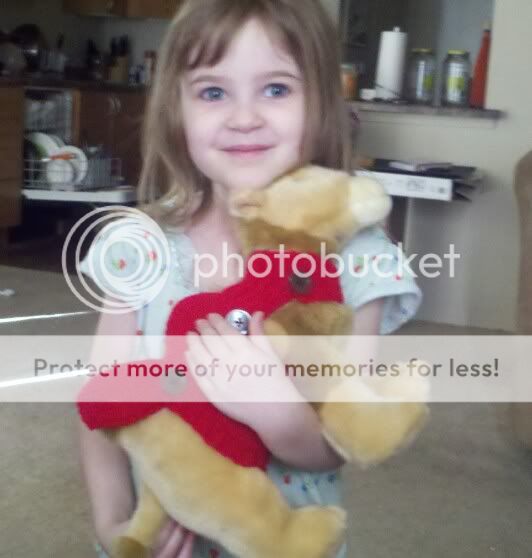
And just in case you have a miniature camel in your house...this sweater works for those too! (my daughter the future zookeeper decided that the stuffed camel needed this sweater more than our chihuahua did...who can argue with that face?)

Well helloooooooo....
Helloo! Welcome to my little corner of the interwebz.
I'm Alisha, I knit, I crochet, I sew, I coupon... I'm a Mom, a Sister, an Auntie and a friend.
I'm a fledgling pattern designer, although so far the only one who has gotten anything designed for them has been my chihuahua. I figured I'd start small. lol
You can find me on Ravelry (alishaknits) and eventually I'll get around to twittering and facebooking too...but for now I've got my hands full.
If you like one of my patterns and want to make it, please add it to your Ravelry projects or leave me a comment on the pattern post. I love seeing how things turn out!
Subscribe to:
Posts (Atom)